Overview
Genio (formerly Glean) is a note-taking and learning application compatible with laptops, desktops, and mobile devices, supporting all major operating systems including macOS, Windows, Linux, Chrome OS, iOS, and Android.
Designed to accommodate a diverse range of learners, it allows users to capture audio from live lectures or videos, generate transcripts, and add both typed and handwritten notes. Additionally, it enables importing slides, revisiting recordings, and organizing or sharing materials.
Genio aims to streamline the note-taking process, allowing users to concentrate on the content during class. This guide outlines its key features, including audio recording and transcription, note-taking tools, slide integration, AI-supported study functionalities, and options for organizing and reviewing course materials.
How to Use Genio
Logging In
Starting with the Free Trial:
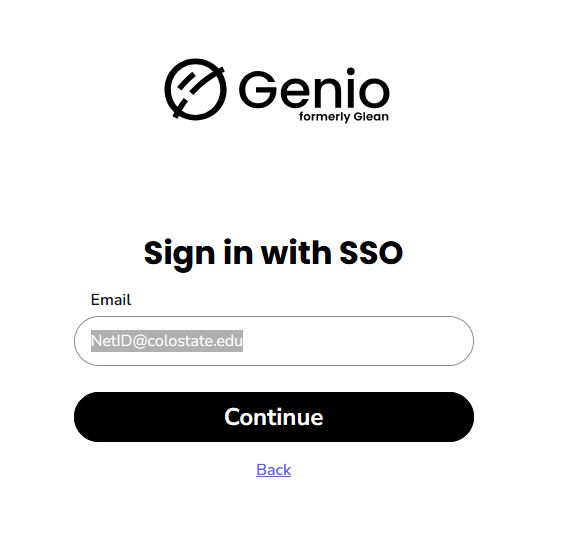
- Important: Use your NetID@colostate.edu email account to sign up for the free trial. This way, your existing account can be activated if you receive Genio as an accommodation through the ATRC.
- This step is only needed if signing up before meeting with the ATRC.
By Invitation:
- After clicking the “Get Started” link in your outlook email, choose Sign in with SSO.
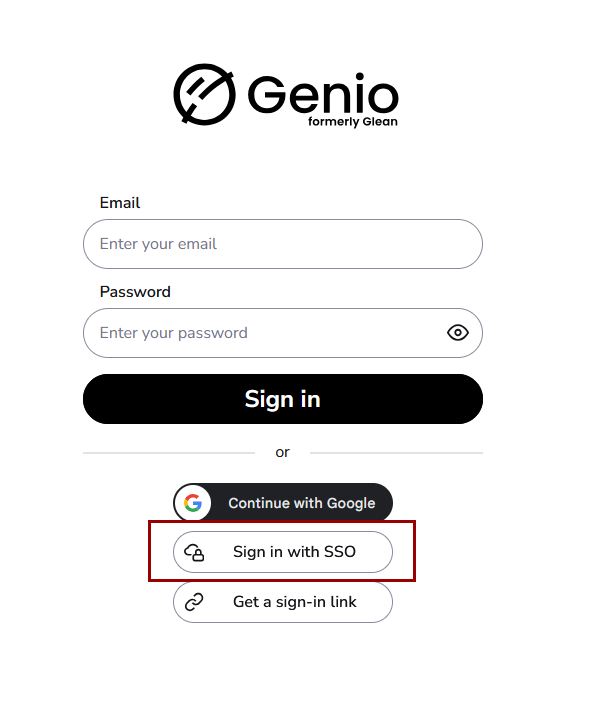
- Login with your NetID@colostate.edu email address and password.
Collections - Organizing Courses
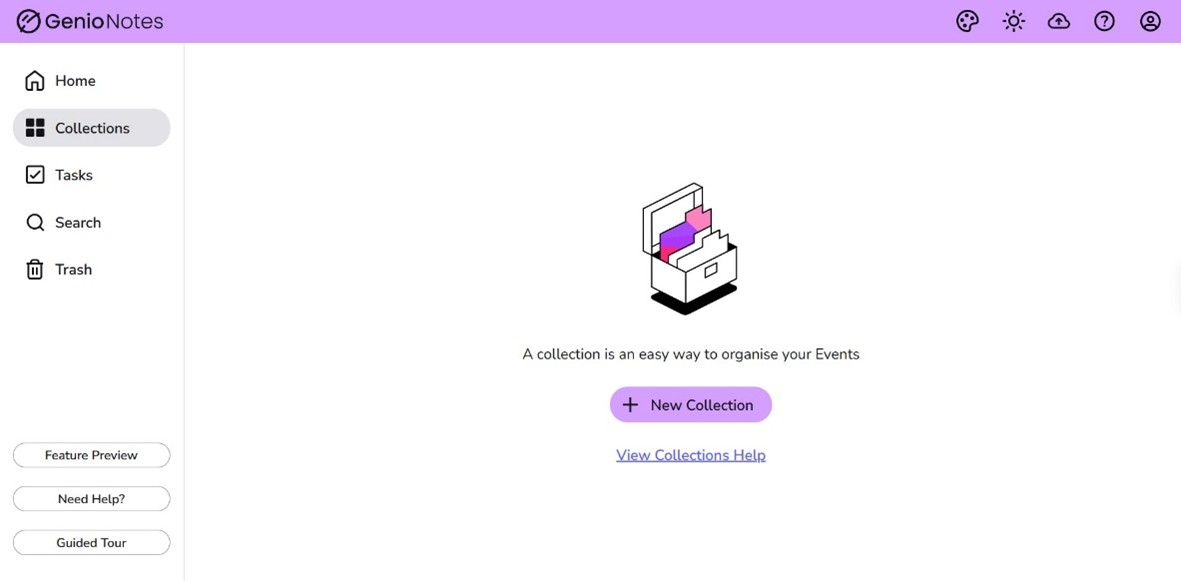
- To organize your courses, select Collections in the left navigation menu.
- Click on New Collection and then Add collection name to create your course.
- Add a collection for each course.
Events - Setting up a Recording
Create your recordings under Collections by starting an Event.
- Lecture recordings are called Events. You’ll create a new event for each individual recording.
- On the Add collection name page, click New Event.
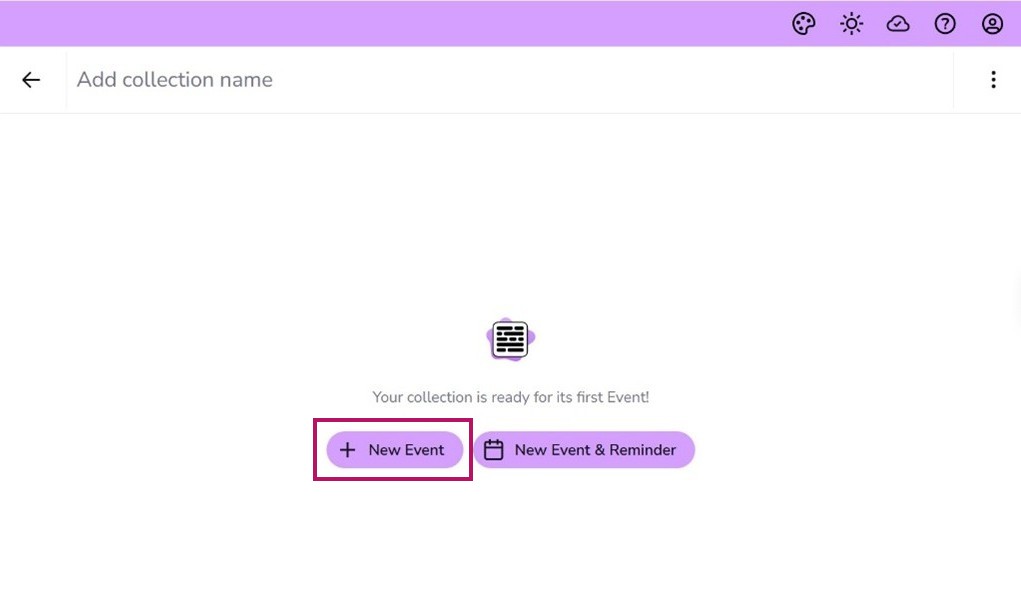
Organization: Type in the Add Event Name field to label recordings with the date, week, or lecture title.
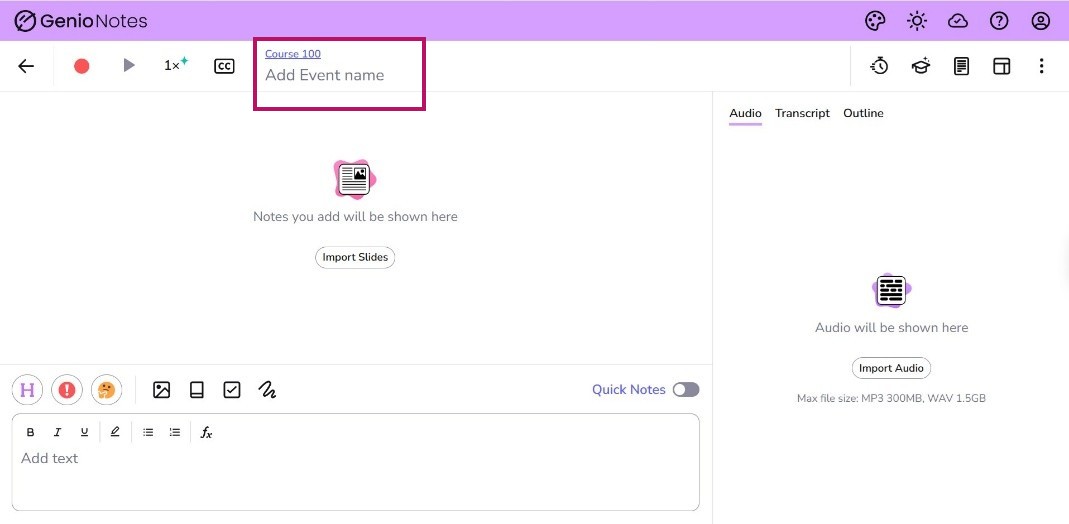
Import Slides: Before you record, click the Import Slides button in the center of the page and add the slides for this lecture. This allows you to sync your notes with both the slides and the audio recording.
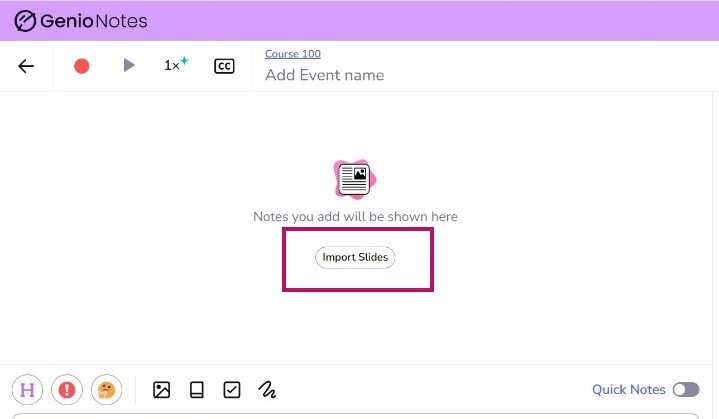
Closed Captioning: Click the Closed Captioning icon to turn on live captions.
- These display as a scrolling transcript and are not part of the recording.
- You can scroll back and forth through captions during the live session if you miss something.
- The transcript is saved after the recording is finished.
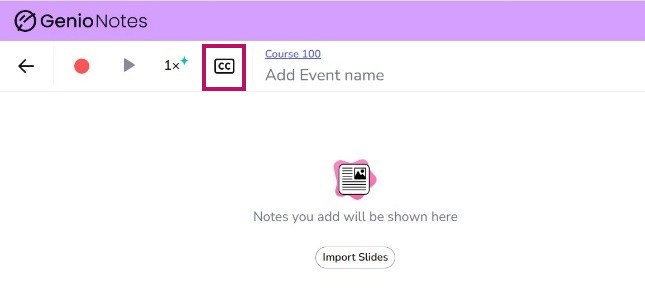
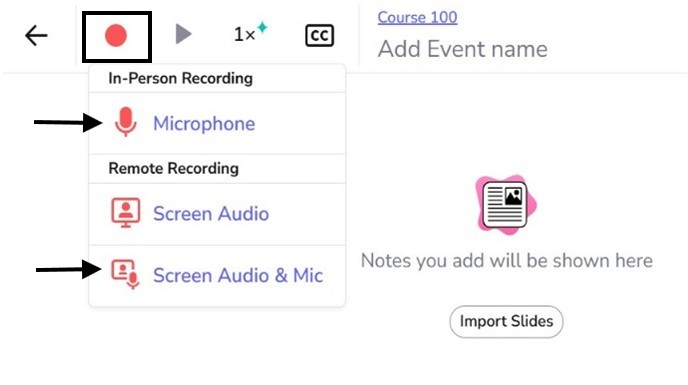
Begin Recording: In the top navigation menu, click on the red circle icon to find the Recording Options menu. Set the microphone source depending on whether the event is in person or online:
Genio will begin recording audio when one of the recording buttons is clicked. Click the button again to stop recording.
- In class or at a live event, you will use the Microphone option.
- For an online meeting, you will use the Screen Audio & Mic option
- After completing a recording, you have the option to click the pause/play button to either pause or listen to the recording.
- You can also import audio from a different source by clicking the “Import Audio” button on the right side of the screen
Note-Taking
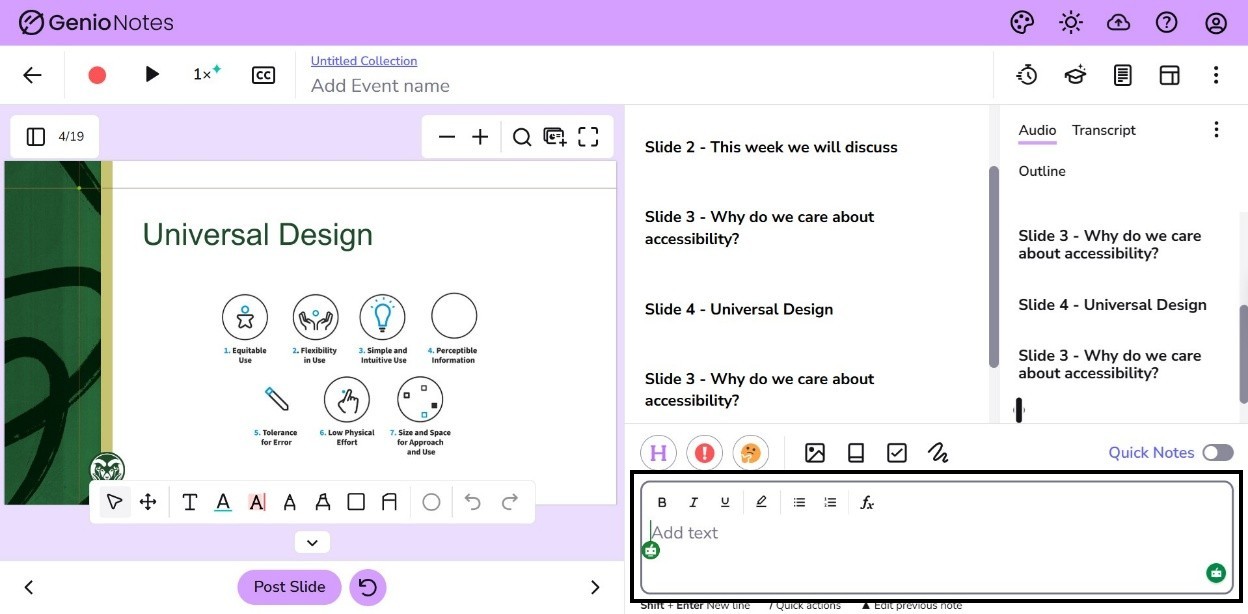
Any notes you type during the recording will sync with the audio and the slides so you can go back to a specific point in the recording to review the lecture and notes.
Add Text: At the bottom of the screen, type your notes in text box that reads Add text. Press Enter to add the note to the slide.
- This will time stamp and sync your notes to the audio and the slide.
- Continue adding individual notes as you listen until it’s time to move to the next slide.
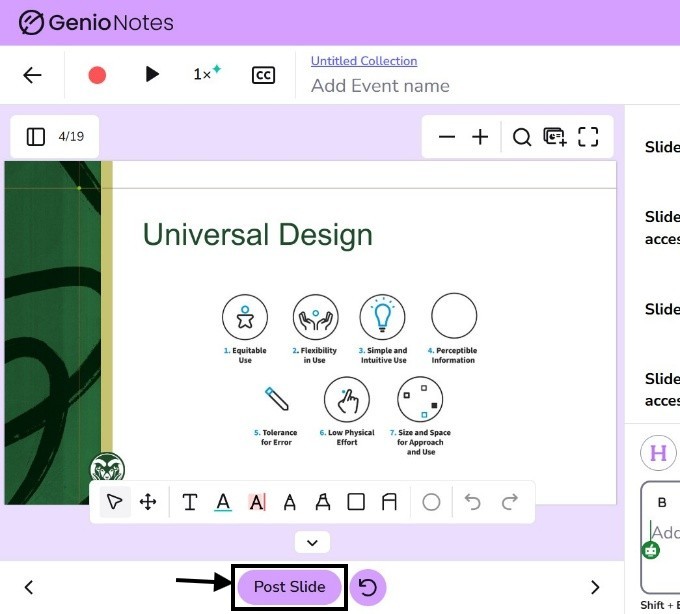
Post Slide: When moving to the next slide, it is crucial to click Post Slide so that notes, slides and audio are all synced together. Do not just use navigation arrows to move to the next slide.
Flagging Important Content
There are several icons above the Text box. These allow you to add emphasis to important content in your notes for easier review.

- Headings: You can insert a section title in your notes for the current slide. Click the Heading icon to turn a note into a title that will appear above the audio recording. The text box will turn purple to show you’re typing a heading.
- Important: Click the Important icon to mark the note text as important. An exclamation point will appear next to your notes for that location.
- Review: Click the Review button to mark sections of audio that require review. A thoughtful face icon will appear next to your notes on that section.
The second group of icons above the Text box allow you to add other kinds of content to enhance your notes, such as Images, Definitions, and Tasks.

The Scribble icon at the end of the row allows you to write notes with a stylus instead of typing.

Generating a Transcript
When finished recording, toggle the microphone off.
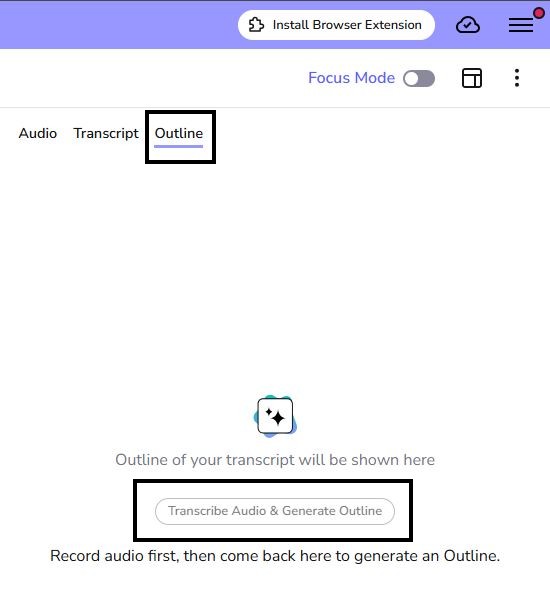
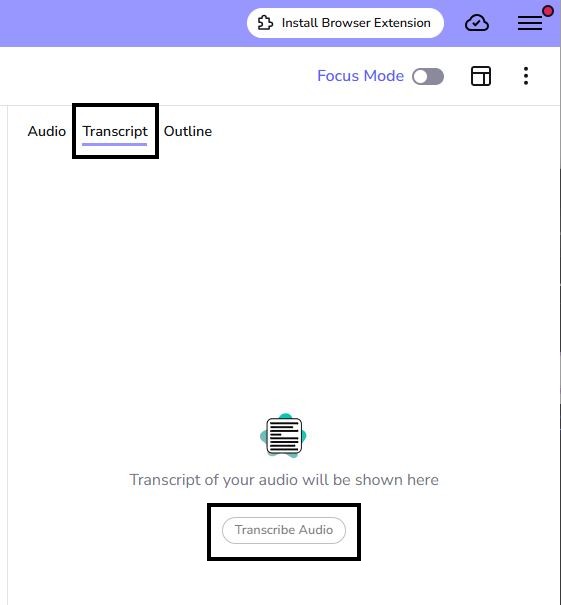
Select the Transcript tab on the right side of the screen and click Transcribe Audio to generate a transcript.
Select the Outline tab to see an AI generated outline.