


Getting Started with Tables
The Universal Design Goals below are based on the Electronic Accessibility Rubric. Employees are expected to work towards meeting Universal Design Goals for their content.
Full Accessibility items are necessary to make content fully accessible. These items may require additional support or alternative access if needed for an accommodation.
Universal Design Goals
Table Design
When creating tables, design them with these principles in mind:
- Use tables for presenting data, not for content layout
- Avoid merged cells
- Avoid multiple title rows
- When necessary, use multiple tables to maintain a single purpose for each column
Designate a Header Row
Tutorials are available for adding a header row in specific software:
Consolidate Multiple Header Rows
One problem you may run into is that there are multiple rows with header information in a table. In this example, there are three header rows with several merged cells. We need to simplify the information so that there’s only one header row.
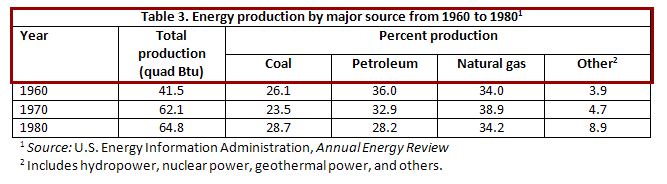
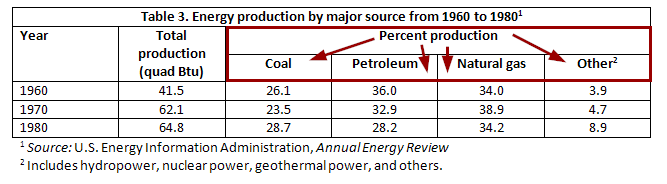
The first step is to consolidate necessary header information into one row. There’s an extra row of merged cells just for “percent production.” This refers to the four cells beneath it, coal, petroleum, natural gas and other. If we add “percent production” into each cell of the next row, we can eliminate the extra row and also the merged cells.
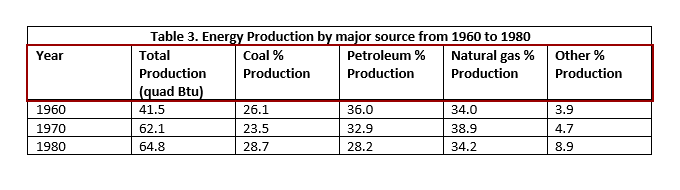
Now the table has only two header rows, but it hasn’t lost any of the information from the original table:
Move Overall Table Title
Often, titles are included inside a table. However, these shouldn’t be part of the table itself.
In our example table, the first row is a single merged cell with the text “Table 3. Energy production by major source from 1960 to 1980.” This is clearly the title of the table. By moving it to a heading outside of the table, we can eliminate an extra row as well as merged cells.
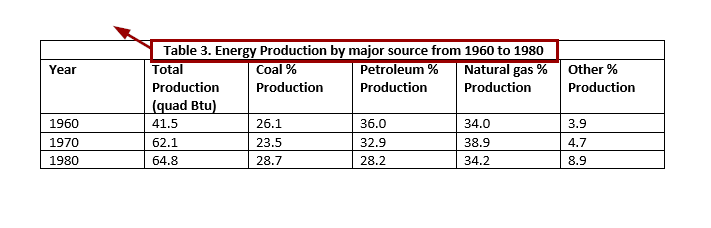
Now that the title has been removed, our table only has one header row. This table is much simpler and easier to read for everyone, including screen reader users:

Accessibility Goals
Remove Nondata
- Tables are for presenting data. Any explanation of the table or extra details should be explained in the surrounding text, not within the table itself.
- Move any text that is not data or header information outside of the table into a caption or table description.
Unmerge Cells
Merged cells usually exist for visual appearance, but they create confusion for screen reader users.
- Repeat information in cells if necessary.
- Leaving cells blank is not ideal for accessibility, but is better than merged cells.
Split into Multiple Tables
Splitting a table can eliminate merged cells, extra titles and other content that is not truly part of the table data.
To know where a table may be split, look for:
- Blank rows
- Extra title rows in the middle of the table
- Rows with merged cells in the middle of the table
Move Remaining Extra Content
- Move any remaining content of merged cells outside the table