Where to Start with Converted PDFs
The Priority Tasks below are based on the emerging steps of the Electronic Accessibility Rubric. Completing the Priority Tasks will help you meet the universal design goal for PDF documents converted from other programs such as Word, PowerPoint or InDesign. Using the rubric helps to prioritize the easiest steps and those that will have the most impact.
The Advanced Tasks are necessary to make a document fully accessible, but we advise mastering the priority tasks first, unless your content involves forms.
Priority Tasks
Start with an Accessible Source Document
It’s always easiest to make a document accessible in the original software. If possible, go back to the source document to fix issues and re-convert to PDF. Working in Acrobat is more difficult.
Follow the tutorials for the appropriate content types before continuing with the next steps for converted PDF. These are the tutorials for the most common source documents:
Enable Tags when Saving as PDF
If you’ve made a source document accessible, then these features will carry over into the PDF as long as you use the correct method of conversion, one that allows tags to be created in the PDF.
Tags are code-level labels that Adobe uses to identify the document structure. Tags are used for everything from headings to alternative text to form fields. Save your document with tags and most of the work is already done in the resulting PDF.
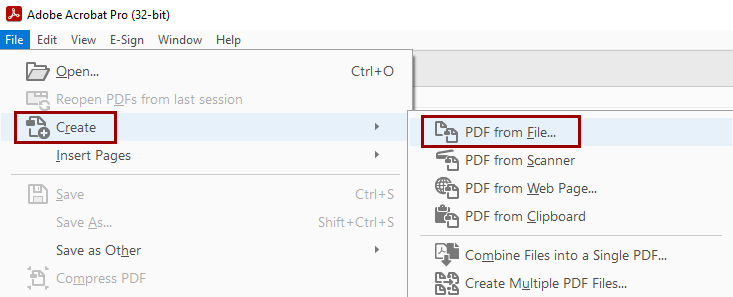
The best way to convert to PDF is to open Adobe Acrobat Professional and create a PDF from there. In the File menu, choose Create > PDF from File and navigate to the file you want to convert. This method preserves tags with the most accuracy.
If you don’t have Adobe Acrobat Pro, you can use the built-in Microsoft Office converter, but the resulting PDF may have some accessibility issues. Acrobat Pro is still needed to check and fix these types of issues after conversion.
To use the built-in Microsoft Office converter, open the File menu, then choose Save As and select PDF as the file type.

Avoid Printing to PDF
Printing to PDF strips out all accessibility features. Some free and online PDF creation software (such as Canva) also act as printing to PDF and have no accessibility features.
If these are your only available options, treat the resulting document like a Scanned PDF.
Advanced Tasks in Acrobat Professional
Set the Document Title
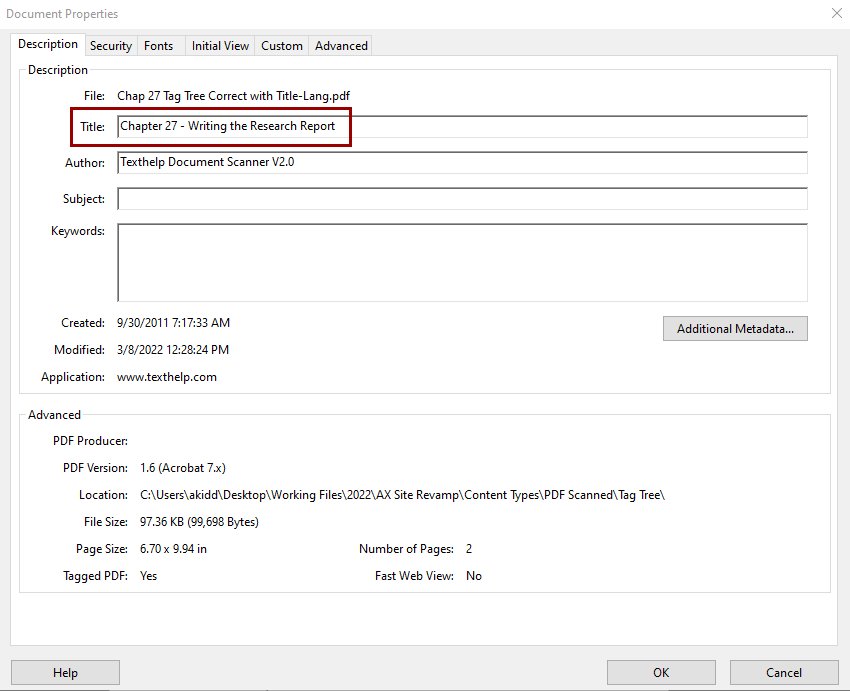
To set the Document Title, open File, Properties. On the Description tab, type a descriptive document title in the Title field.
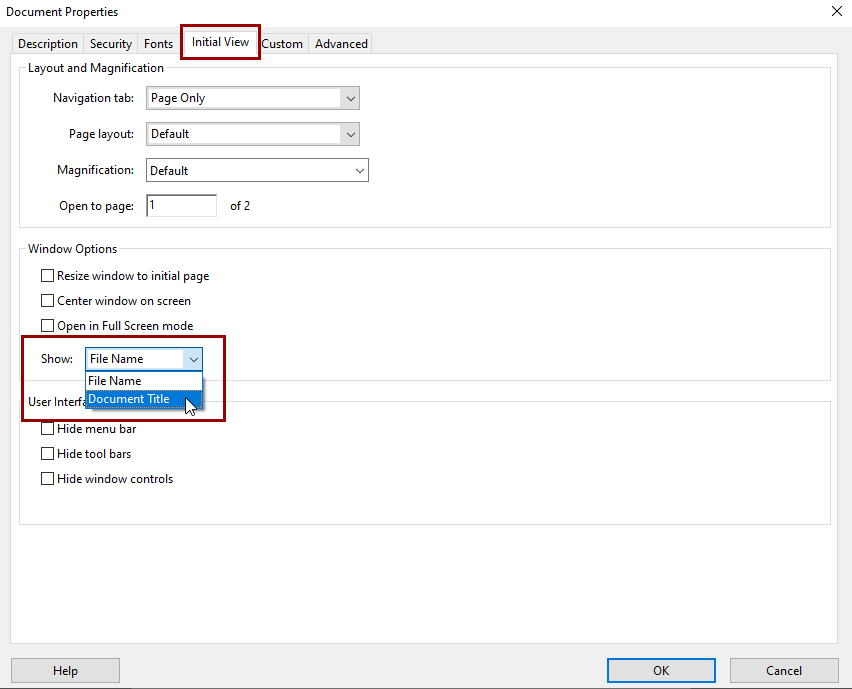
Next, set the document title to display instead of the file name when the document is open.
- Switch to the Initial View tab in the Properties window.
- Look for the Show drop-down menu under Window Options.
- Change the selection from File Name to Document Title.
Set the Document Language
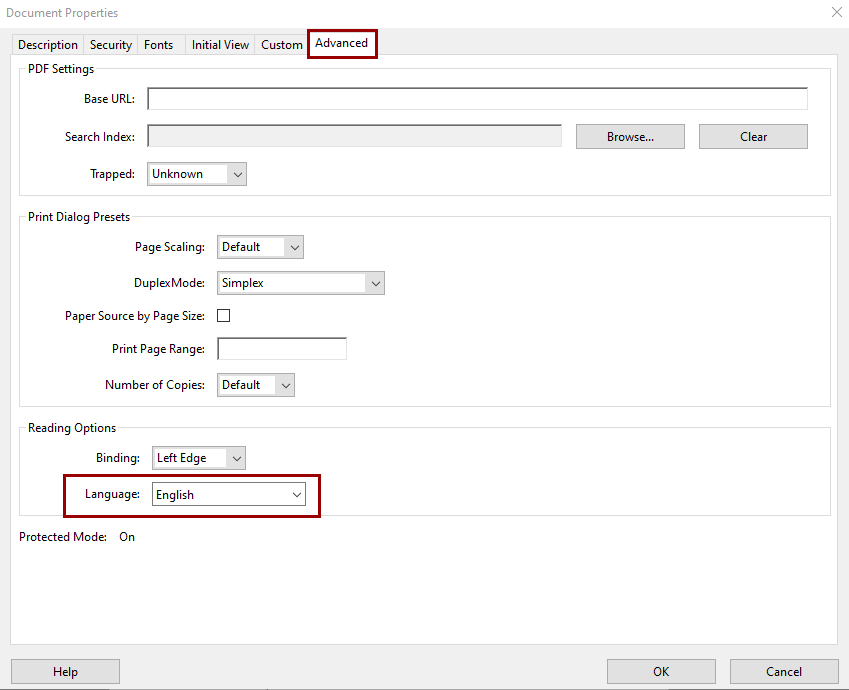
To set the primary language of the document, open File, Properties. On the Advanced tab, find the Language drop-down menu under Reading Options. Set the language to the primary language of the document.
Reading Order Panel - Page Content Order
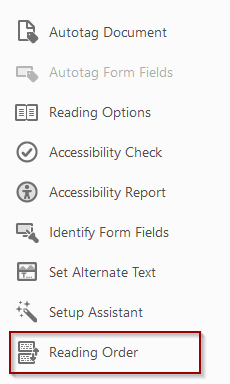
When saving as PDF, content is sometimes out of order. To check the content order, open the Reading Order Panel. On the Accessibility Toolbar, select Reading Order.
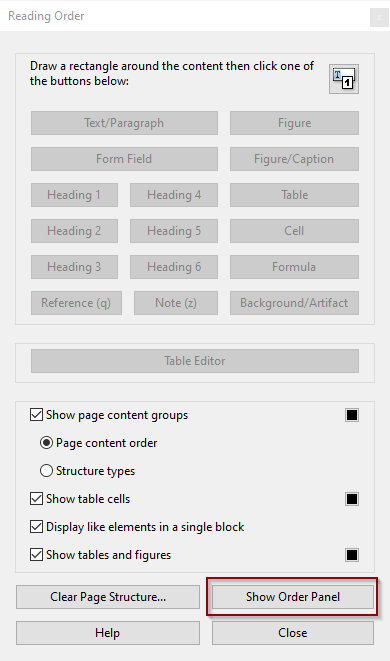
Select Show Order Panel on the Reading Order window:
This opens a panel on the left side of the document. The numbers in the panel correspond to the numbers highlighted on the page. These numbers are the visual representation of the tags.
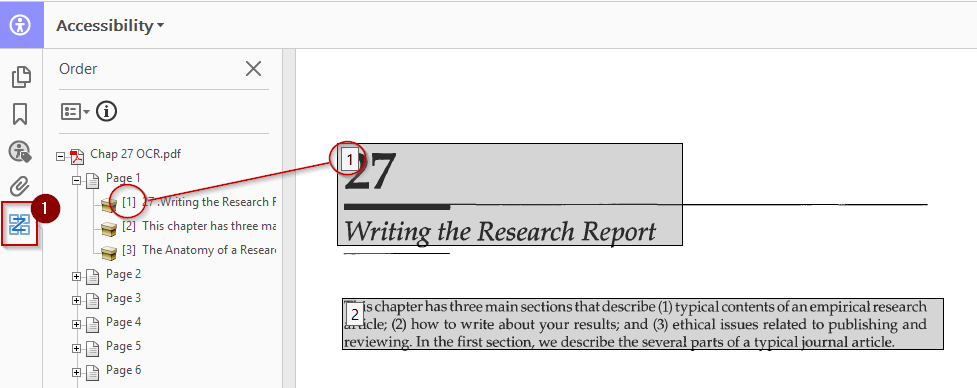
If the numbers are not in a logical order, drag the tag into the correct position in the panel.
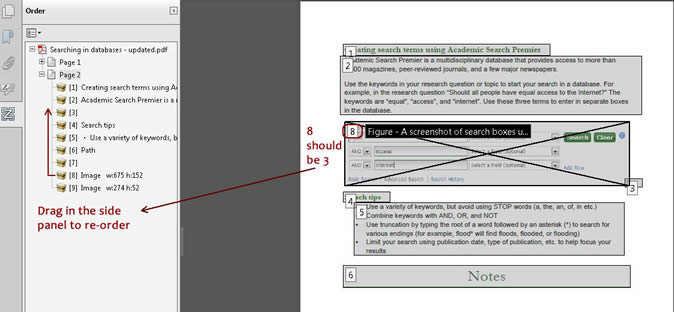
Note: Acrobat has a bug when dragging tags that sometimes causes them to disappear. There is no “undo” when editing tags. Save often so you can recover easily if something goes wrong.
Reading Order Panel - Structure Types
When saving as PDF, the headings should also automatically save. The Reading Order tool allows you to check for document structure.
On the Reading Order window, change the radio button from Page content order to Structure types.
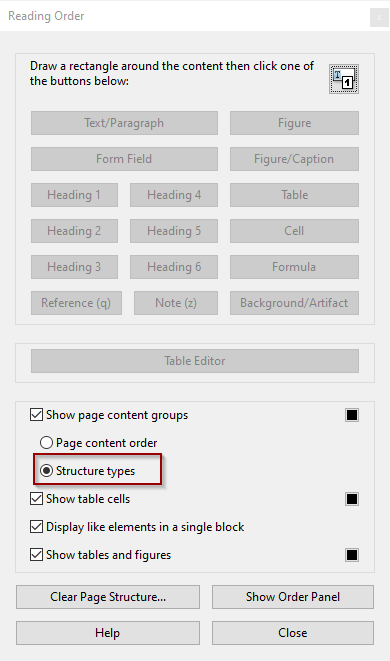
You’ll see that the numbers on the page that showed reading order have changed to structure tags such as P for Text/Paragraph and H1 for Heading 1.
This example has tags, but they are all set to P, leaving the document without a heading structure:
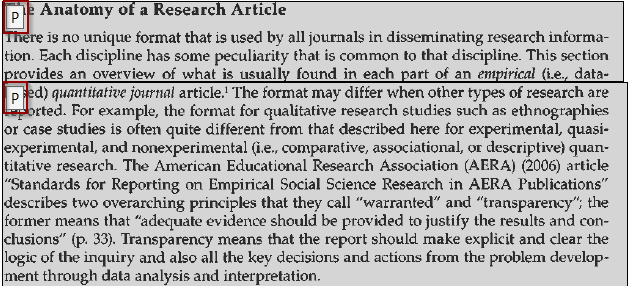
To set the headings, select the area that needs a different tag. There are two ways to do this.
- Select an existing tag, if it only includes the relevant text. This will select the entire shaded area that belongs to the tag.
- Use the cursor to draw a box around the text. This may be needed if text is grouped together. The selected text will have pink boxes drawn around it so you can be sure which text will be tagged.
In each case, once selected, use the heading buttons on the Reading Order tool to set the appropriate heading level.
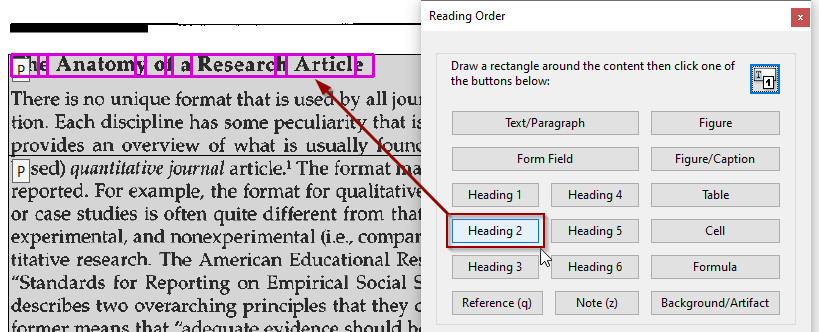
The tag will visually change in the document from P to H2, and the shaded area will break into sections.

Form Field Labels
If your document is a fillable form, simply creating the form fields is not enough. The fields need descriptive labels. To check the labels, go to Tools, Prepare Form. (Earlier versions of Acrobat: Tools, Forms, Edit.)
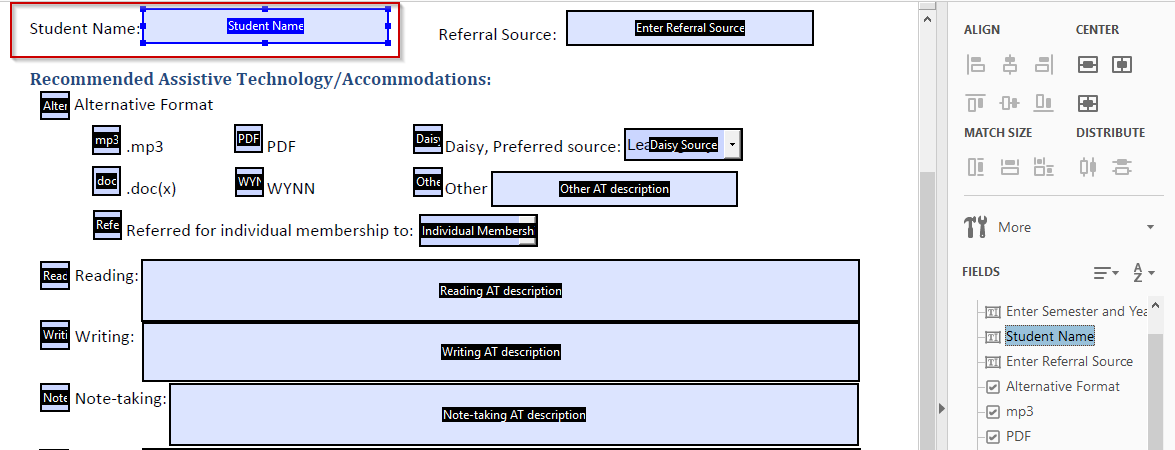
Existing form fields will be highlighted within the document. The form field labels will appear inside fields. Check these labels to make sure they are descriptive. In the example below, you can see that the Student Name field matches the label.
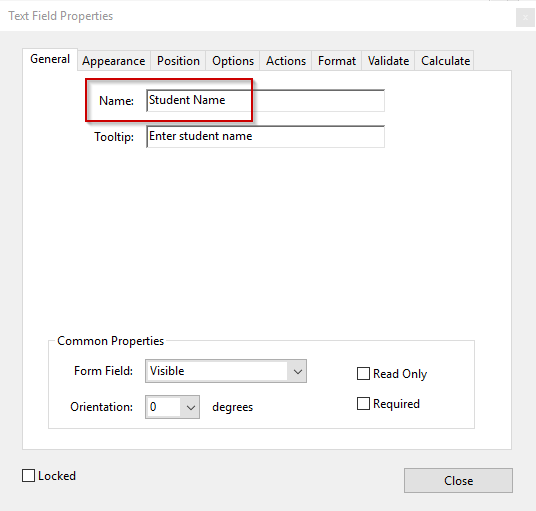
If the label isn’t descriptive, double-click on it to edit. In the Text Field Properties dialog box that appears, edit the Name field.
The Name and Tooltip should be the same.
Form Field Tab Order
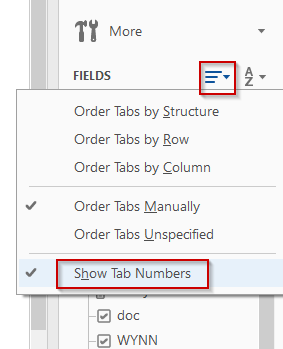
Once your labels are correct, check the tab order. Click on the drop-down menu icon next to “Fields” in the Form toolbar (Acrobat DC). Select Show Tab Numbers.
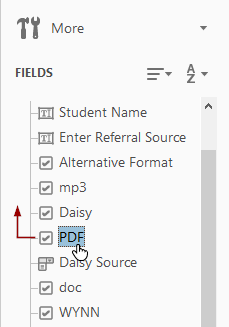
You should see numbers inside of each form field that tell you the tab order. In the screen shot below, the logical order for the check boxes should be mp3 (6), PDF (7), then Daisy (8). With the current incorrect tab order, it will be read as mp3 (6), Daisy (7), then PDF (8).

To fix the tab order, select and drag “PDF” upwards into the correct position between mp3 and Daisy on the Form Fields toolbar.
Tag Tree - Reading Order
The final (but most important) place to check the tags is in the Tag Tree. Using the Reading Order Panel first is important so that when you get to the Tag Tree, most of the structure should already be correct. There can be lingering issues with tags, however, and the Tag Tree is where you can manually fix those.
Navigating the Tags Pane
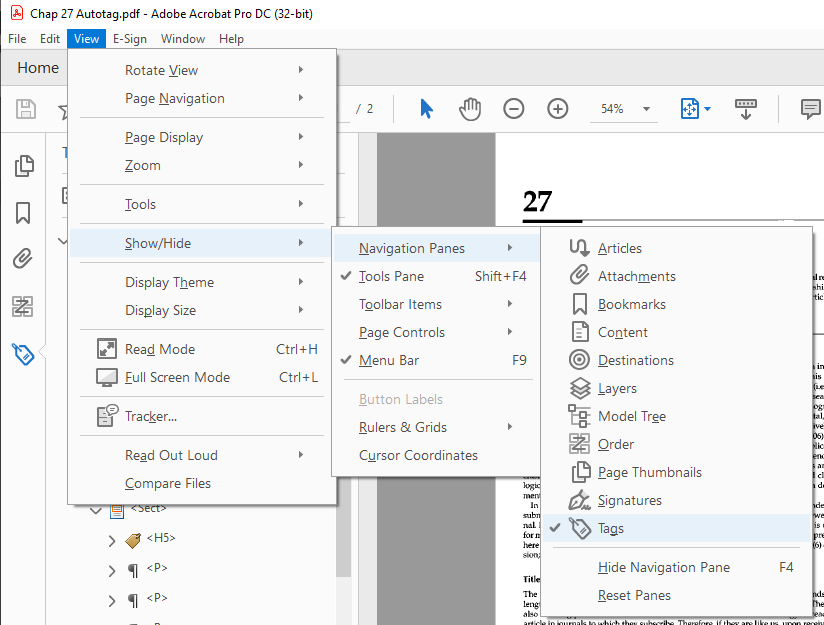
In the View menu, select Show/Hide, Navigation Panes, Tags.
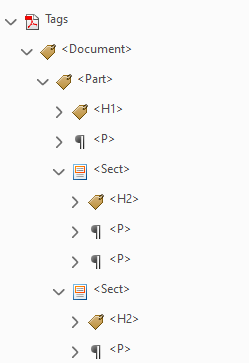
This opens a new panel on the left side of the document. The tags look like HTML. For example, <H1> is Heading 1, and <P> is paragraph text.
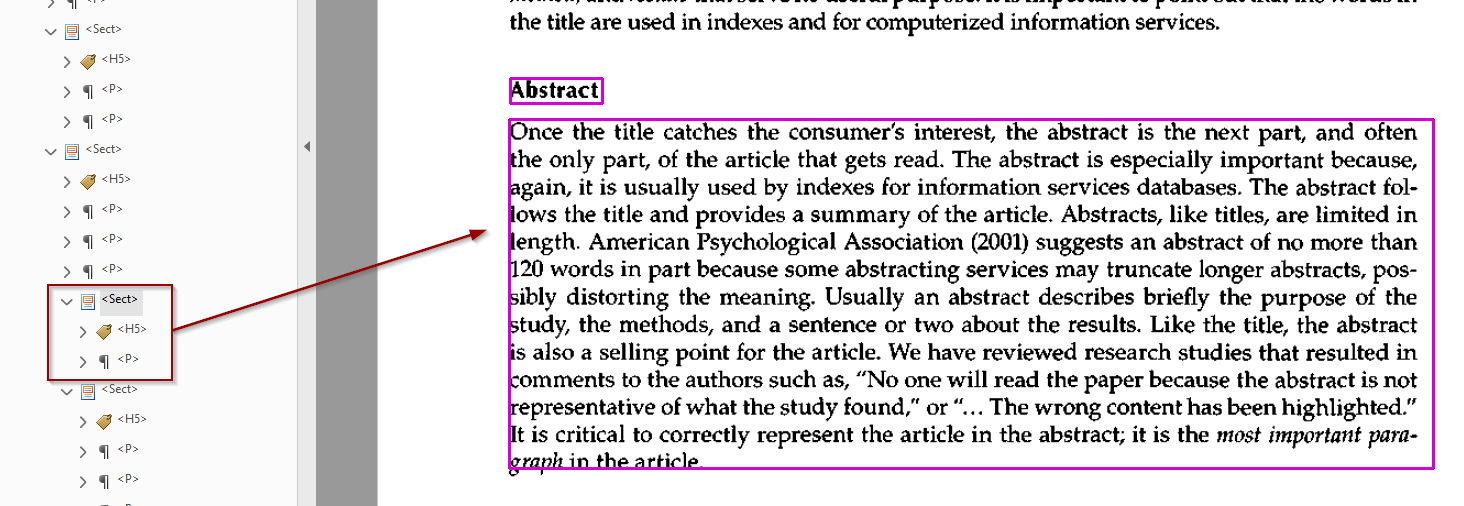
Content is nested inside the tags. If you expand a tag, it will outline the corresponding content on the page in pink, including nested content.
Correcting the Reading Order
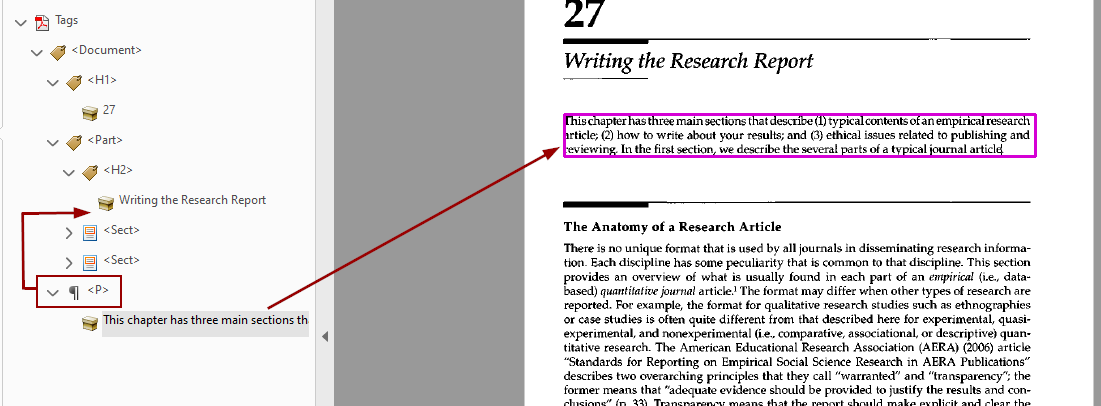
- Begin by clicking down the tag tree to see if the order corresponds with the visual order on the page. You can drag tags into the correct order in the Tags pane.
In this example, the paragraph describing the chapter is at the bottom of the tags. It should be directly underneath the chapter title.
- A line appears as you drag it to indicate where it will move to when you stop dragging. Be careful not to accidentally nest one tag inside another.
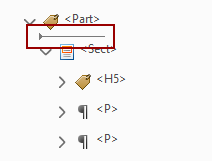
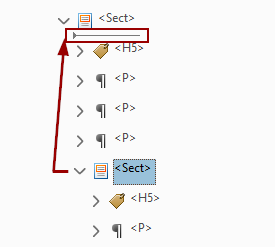
- If tags are nested that shouldn’t be, drag them out into the higher level. For example, here we have two sections nested inside another section. They all should be at the same level within the tree.
Tag Tree - Page Structure
Sometimes it takes significant manual editing to correct the document structure. These are some of the problems you should look for.
Document Tag
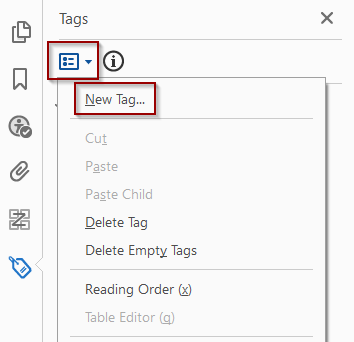
All of the tags in a PDF should be within an overall Document tag. Currently, this is not created by default and must be added manually.
Click on the Tag Options drop-down menu and select New Tag.
Select Document as the tag type.
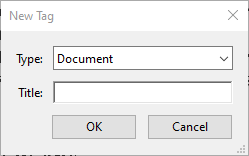
Drag all of the other tags so they’re nested inside the Document tag. Select all of the tags at once so you can drag them into the Document tag in one step. This will maintain the reading order.
Incorrect Tag Labels
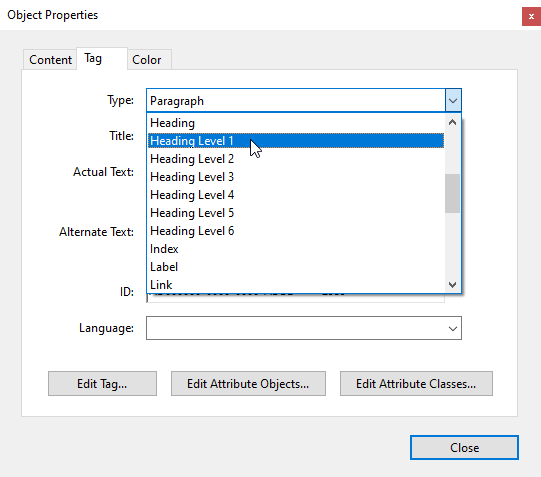
Tags may be labeled incorrectly, as in this example of a heading that’s labeled as paragraph text.

- Right-click on the tag and select Properties.
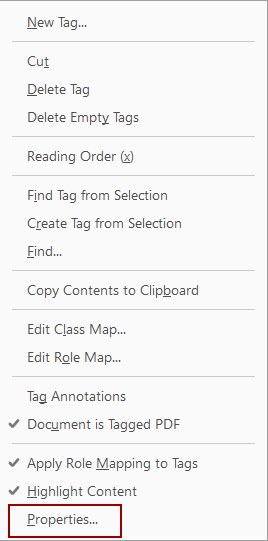
- Use the Type drop-down menu to select the appropriate heading level.
Untagged Content
All content should be tagged. If you find content that is skipped as you go down the tag tree, first see if there’s a tag associated with it that’s simply out of order.
- Select the content in the document. Click on the Tag Options drop-down menu and select Find Tag From Selection.
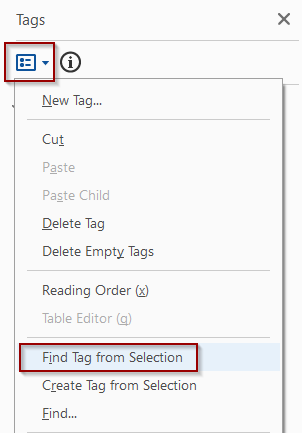
- If a tag already exists, drag it into the correct order in the tags pane.
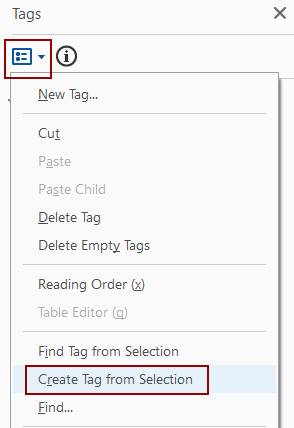
- If no tag is found, create a new tag. Select the content in the document and then click Tag Options, Create Tag from Selection. Once the tag is created, drag it into the correct order in the tag pane and make sure it’s labeled correctly.
Empty Tags
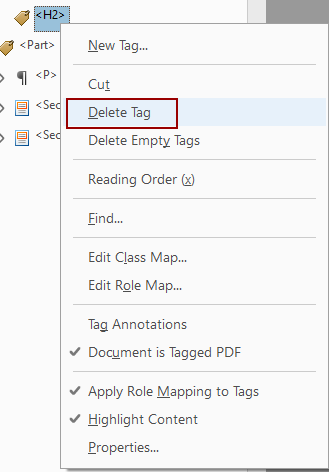
A tag is empty if there’s no way to expand it because nothing is nested inside it. Empty tags create confusion and they need to either be filled or deleted.
- Check first to see if the content that should be in the tag is in another tag. If so, move the content into the empty tag.
- Once you’re sure the tag is not needed, right-click on it and select Delete Tag.
